
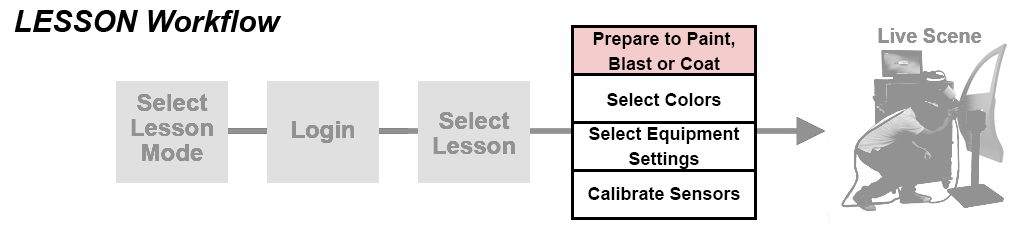
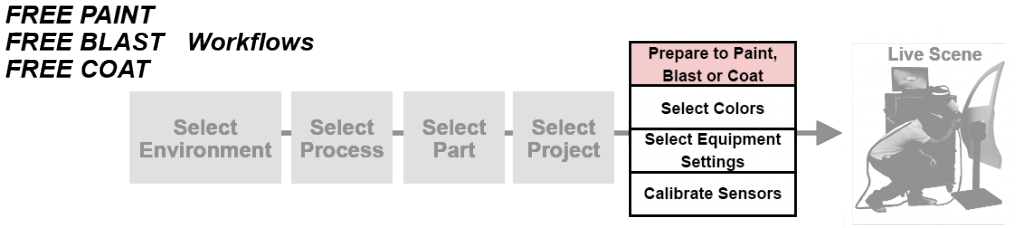
Users need to prepare to Paint, Blast, or Powder Coat their selected Project by:
- Selecting Colors to use
- Selecting appropriate Equipment Settings
- Calibrating motion sensors to track movements
Users will encounter these steps in Free Paint, Free Blast, Free Coat and Lesson Modes and must complete them in order to continue to the Live Scene.
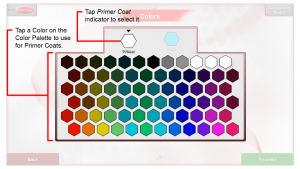
Selecting Colors
Users select one Color to use for all Primer Coats and one Color to use for all Color Coats in the selected Project.
Selecting Colors to use for a Project is done from the Colors page.
- On the Colors page tap a Color to use for Color Coats.
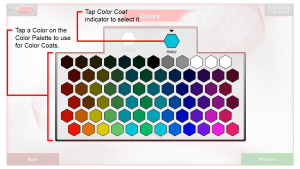
- Select the paint finish (matte, semi-gloss, or gloss) for the coat.
- Available starting in v3.1.x software.
- If Primer Coats are included in the selected Project tap the Primer Color indicator then tap a Color to use for Primer Coats.
Selecting or Reviewing Equipment Settings
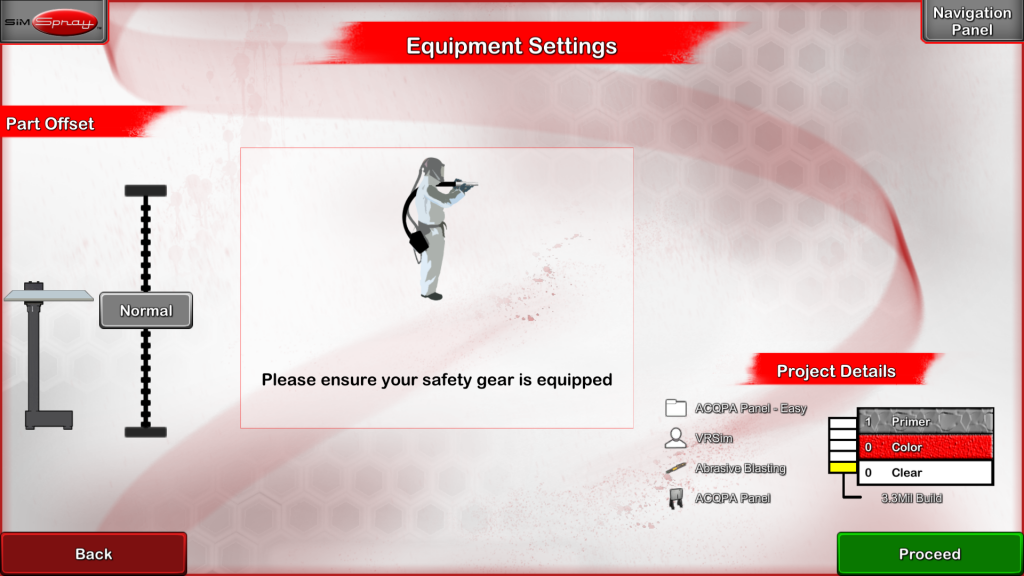
To Paint or Powder Coat, you must first select Equipment Settings appropriate for the selected Project. Blast Equipment Settings are preset but are displayed so you can review them.
Note: Equipment Settings are meant to expose Users to proper settings. With the exception of Tip Sizes, changing the Equipment Settings does not change how the Paint or Powder goes down in the Live Scene. For Powder Coating, Users can use Faraday Mode in the Live Scene to change how the Powder goes down.
Paint Equipment Settings
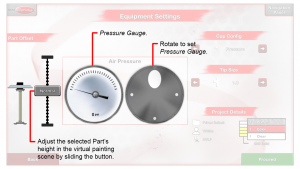
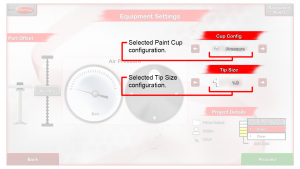
On the Equipment Settings page, rotate the Air and/or Fluid Pressure Dial(s) to set the Pressure Gauge(s) to the selected pressure setting(s) and tap to select a Paint Cup configuration and Tip Size. Tap the Proceed button.
Paint Tip Sizes
Available in software v2.2 and later:
Selecting a different Tip Size changes the paint flow volume rate for HVLP and the paint flow volume rate and pattern size in Airless and Air-Assisted Airless.
HVLP:
- 0.5 – 2.5 in intervals of 0.1 (e.g., 0.5, 0.6, 0.7, …, 2.5) (software v3.2 and later)
- 1.0, 1.2, 1.3, and 1.5 (software v2.2-v3.1.0)
Airless and Air-Assisted Airless:
- Fan size: 2-15 in intervals of 1 (e.g., 2, 3, 4, …, 15) (software v3.2 and later)
Orifice Size: 7 – 35 in intervals of 2 (e.g., 7, 9, 11, …, 35) (software v3.2 and later) - 313, 415, 517, and 614 (software v2.2-v3.1.0)
Live Gun Adjustments
Available in v2.2.x software and later:
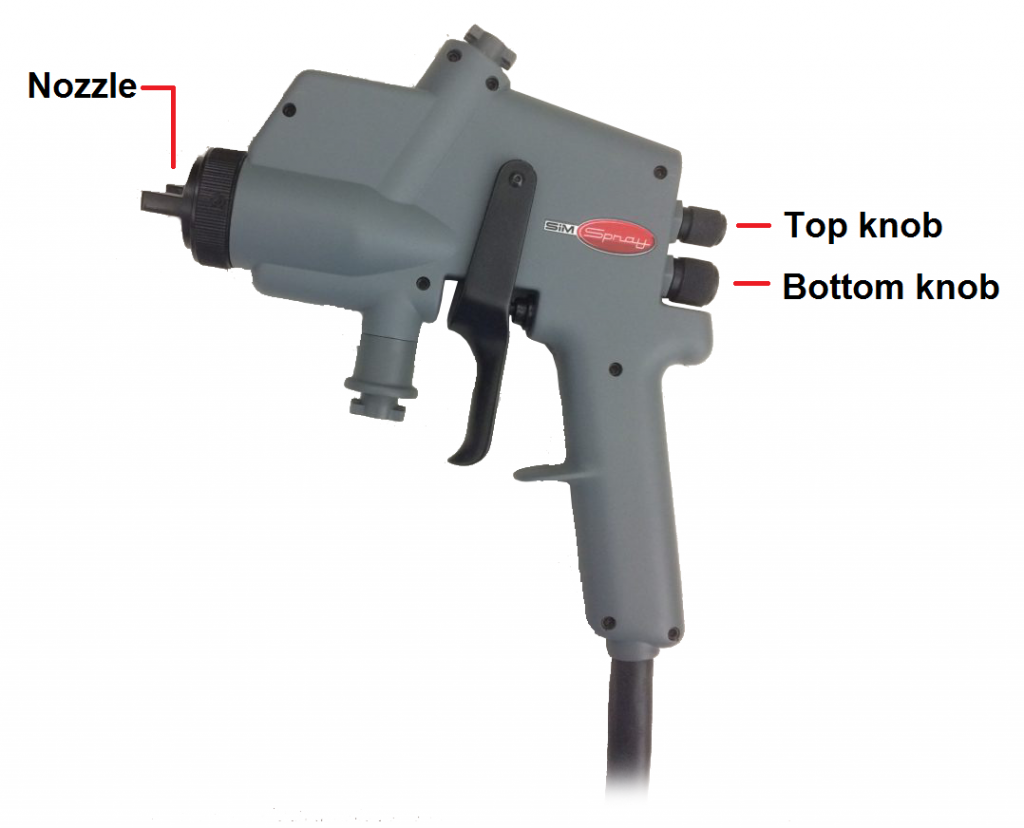
When in the environment, adjust the Spray Gun dials for real-time effects.
HVLP
The back, top physical dial on the Gun adjusts the fan pattern size. Increasing the % increases the size.
- Available in v2.2.x software and later, increasing the size spreads (decreases the thickness of) the paint reaching the Part. The default is set to 100% fan pattern size. Decreasing this knob directly affects and increases the target Travel Speed and Travel Speed Cue.
The back, bottom physical dial adjusts the fluid flow amount. Increasing the % increases the amount of paint.
- Available in v2.2.x software and later, this knob much more significantly affects the amount of paint. In earlier versions, the fluid flow amount adjusted only slightly. The default is set to 50% fluid amount. Increasing this knob directly affects and increases the target Travel Speed and Travel Speed Cue.
Rotate the front nozzle by 90 degrees to change the pattern orientation between vertical and horizontal.
 Air-Assisted Airless
Available in v2.2.x software and later:
The back, bottom physical dial on the Gun adjusts the air amount. Increasing the % increases the amount of the paint reaching the Part. Increasing this knob directly affects and increases the target Travel Speed and Travel Speed Cue.
Amount of Paint
Available in v2.2.x software and later:
To increase the amount of liquid paint going down:
- All processes (Air-Assisted Airless, Airless, HVLP):
- Increase the tip size. Adjustable on the Equipment Settings screen.
- Decrease the travel speed. Adjustable in the Admin Portal.
- Decrease the distance to the part. Adjustable in the Admin Portal.
- Air-Assisted Airless:
- Increase the air amount by opening up (increasing the % of) the bottom dial. Adjustable in Live Painting.
- HVLP:
- Decrease the fan pattern size by closing down (reducing the % of) the top fan pattern dial. Adjustable in Live Painting.
- Increase the fluid amount by opening up (increasing the % of) the bottom fluid dial. Adjustable in Live Painting.
To increase how fast paint builds up in Coverage Map Mode:
- Follow the above.
- Decrease the mil target. Adjustable in the Admin Portal.
Blast Equipment Settings
On the Equipment Settings page, review the blast media, damage level and clean rate for the selected Project. Tap the Proceed button.
Blasting Rate
Available starting in v3.1.x software:
- The Blasting Gun’s Angle and Distance affect how quickly the paint and rust get blasted away.
- Rust is removed slower than paint.
- The overall blasting rate was increased from previous versions.
Powder Coat Equipment Settings
On the Equipment Settings page, select the desired settings and Tip Size. Tap the Proceed button.

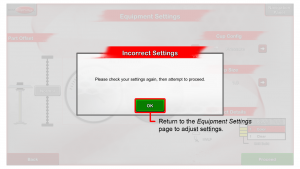
Incorrect Equipment Settings
Attempting to use Equipment Settings outside of the acceptable Equipment Setting Ranges prevents continuing beyond the Equipment Settings page and into the Live Scene.
Equipment Settings for Default Projects can be found on the Default Projects list. See Managing Projects for Custom Projects.
Calibrating Sensors
A Calibration process is necessary to align all tracking sensors before entering the Live Scene. The Calibration process takes place on the Calibration page.
Users will arrive at the Calibration page from the Equipment Settings page. Follow the onscreen instructions to perform the Calibration process.
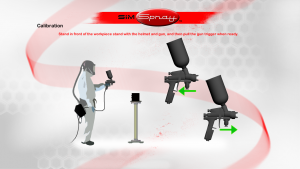
Note: as indicated on the touch screen, you will need to stand still during Calibration. When complete the Live Scene will appear. Users will be able to view the selected Environment and Part through the FMD and perform the selected Project or Lesson.
See Recalibrate for additional information on how to Recalibrate if the Calibration process was unsuccessful.