Category Archives: Using SimSpray

Gun Pass Analysis

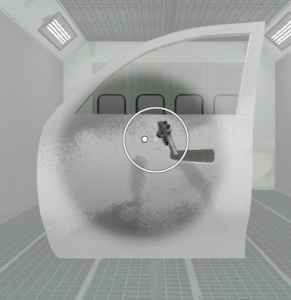
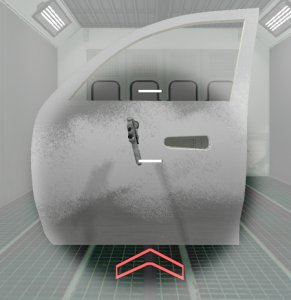
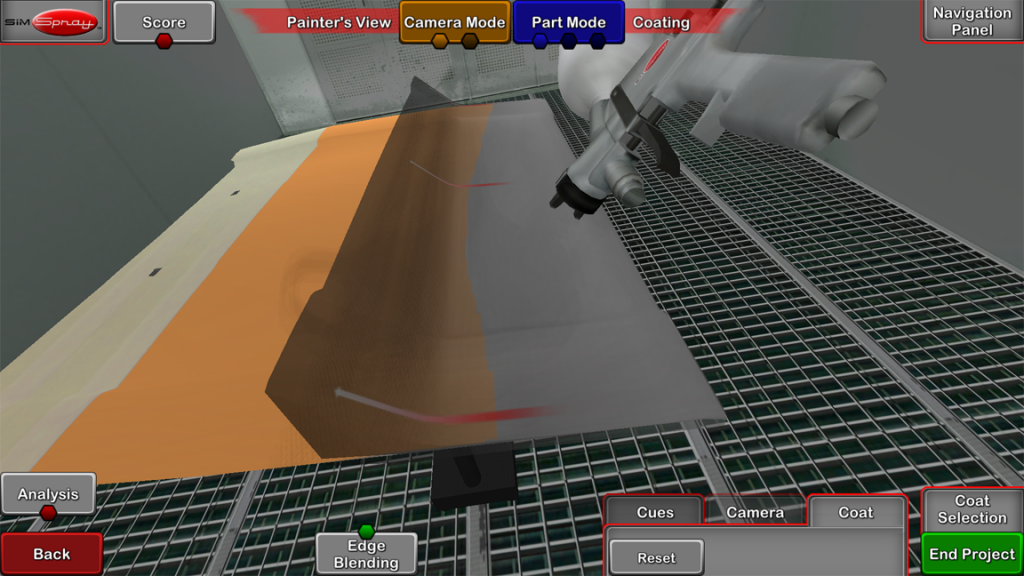
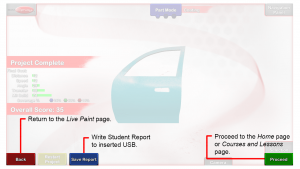
Analysis provides in-depth visual feedback on gun pass technique.  Users can view Analysis by tapping the Analysis button on the Live Paint page.
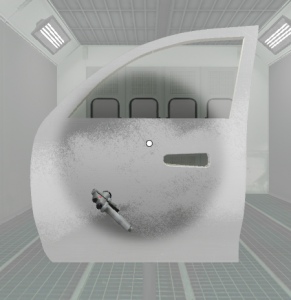
Lines

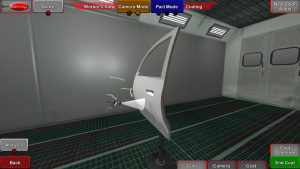
3D lines and real-time gun movement follow the path of each gun pass so Users can view the gun angle to the Part, gun distance from the Part and gun travel speed for each pass per coat.  Toggle the Lines button to view or hide 3D lines and real-time gun movement.
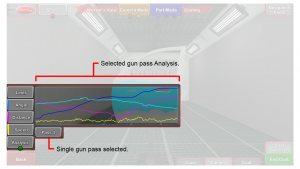
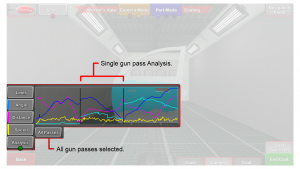
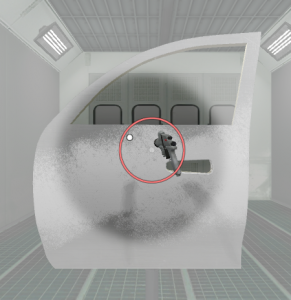
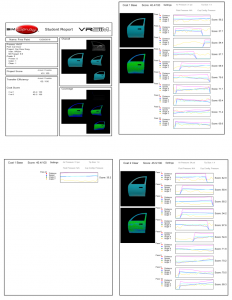
Graphs

Color coded graphs compare gun angles, distance from the part, and speed range for each pass against parameters set in the selected Project.  Users want to get their parameters as close to the target, vertical center, as possible.
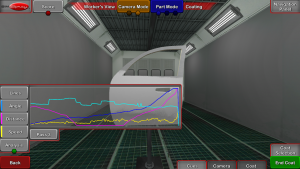
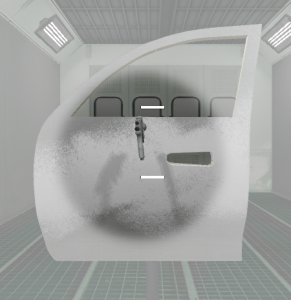
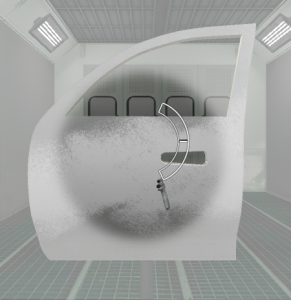
Angle

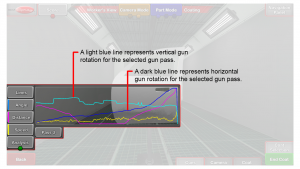
Gun Angle is represented on Graphs by two lines: a light blue line representing vertical gun rotation and a dark blue line representing horizontal gun rotation.  The Angle lines are active and visible when the Angle button is bordered in light blue.

Toggle the Angle button to view or hide gun angle analysis for the selected gun Pass.
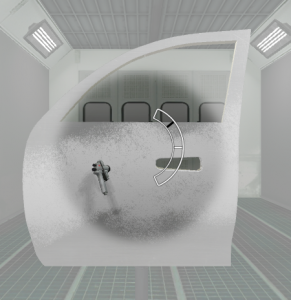
Distance

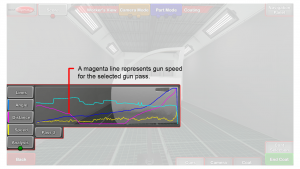
Distance is represented on Graphs as a magenta line.  The Distance line is active and visible when the Distance button is bordered in magenta.

Toggle the Distance button to view or hide gun distance analysis for the selected gun Pass.
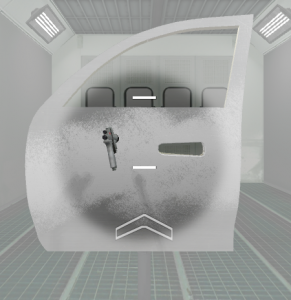
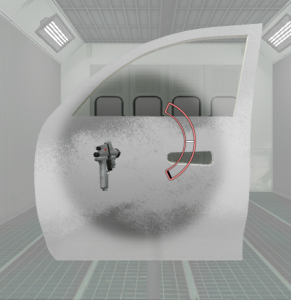
Speed

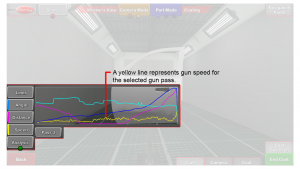
Speed is represented on Graphs as a yellow line. The Speed line is active and visible when the Speed button is bordered in yellow.

Toggle the Speed button to view or hide gun speed analysis for the selected gun Pass.

Passes

Toggle the Pass button to select the gun pass to analyze or select ‘All Passes’ to analyze all gun passes.


Cues

Visual Cues provide Users with in helmet motor skills guidance.  Cues help visually assist Users with gun angle, distance and speed movements.

To use a Cue, tap the Cues button then toggle the Cue button On or Off.  Users may turn on any combination of Cues.

Angle

The Angle Cue assists Users in controlling gun angle as they Paint or Powder Coat.

When the Gun orientation matches the Project Target value (optimum orientation), only the Cue target is displayed.

While the Gun orientation is within the Project target range but not in optimum orientation, the Cue target and circle are displayed in white.

If the Gun orientation is outside the Project target range, the Cue target and circle are displayed in red.

Tap the Cues button then tap the Angle button to toggle the Angle Cue On.

Available starting in v3.1.x software:

  • The Angle Cue will show red in Blasting if the Gun orientation is either too small or too large.

Distance

The Distance Cue assists Users in controlling Gun distance from the Part as they Paint, Blast, or Powder Coat.  The target band appears as two white lines.  When an arrow appears above the target band, the User’s Gun is too close to the Part.  The arrow guides the User to move the Gun away from the Part.  When an arrow appears below the target band, the User’s Gun is too far from the Part.  The arrow guides the User to move the Gun closer to the Part.

When the Gun position matches the Project target value (optimum position) only the Cue target band is displayed.

While the Gun position is within the Project target range but not in optimum position, the Cue target band and white arrow are displayed.

If the gun position is outside the Project target range, the Cue target band and red arrow are displayed.

Tap the Cues button then tap the Distance button to toggle the Distance Cue On.

Speed

The Speed Cue assists Users in controlling Gun speed as they Paint.

The Speed Cue is made up of a black speedometer needle and a white target line.

When the Gun speed matches the Project target value (optimum speed), the speedometer needle is on the Cue target line.

While the gun speed is within the Project target range but not at target value, the speedometer needle is near the target line.

If the gun speed is outside the Project target range, the speedometer needle is not near the target line and the speedometer gauge turns red.

Tap the Cues button then tap the Speed button to toggle the Speed Cue On.

Edge Blending

The Edge Blending Cue assists Users in learning the proper distance and angle necessary for spot and panel painting.  Edge Blending requires Users fan off while blending between the unpainted and already painted sections of the Part.  Users need to stay perpendicular to and the proper distance away from the surface shown of the Edge Blending Cue.

Collision Alerts

Available starting in v2.2.x software.

When the tip of the Gun collides with the virtual Part, a warning sound plays, the Gun stops putting out material, and the Gun rumbles.

Remove Coats & Reset Parts

Users can Remove paint or powder from the Part by tapping the Coat button on the Live Scene then tapping the Remove One button or Remove All button.

One Coat

Tap the Remove One button to remove the current Coat of Paint or Powder from the Part.

If there is only 1 Coat to complete, tap the Reset button.

All Coats

Tap the Remove All button to remove all Coats of Paint or Powder from the Part.

Student Report

v3.3 or later

Student Reports are no longer supported.  See Performance Portal instead.

v3.2.2 or earlier

Note: It’s recommended to keep a USB flash drive connected to your SimSpray at all times.  This way Student Reports will be saved to this drive.

Student Reports are generated and copied to a USB flash drive when Users tap the End Project button to complete the last Coat of a Project.  If no USB flash drive is inserted, Users can insert a USB flash drive and copy the Student Report again by tapping on the Copy Report button on the Project Review page.  Student Reports include a Username when created in Lesson Mode.  Student Reports created in Free Paint, Free Blast, or Free Coat Mode are anonymous.

The Student Report includes:

  • Images and Scores
  • Project Equipment Settings (Painting only)
  • Coat Pass Analysis Graphs, Coat Images, and Scores (Painting only)

Project Review Page

The Project Review page displays the completed Project Score.

The Overall Score is an average of the technique scores. Angle, Distance, Speed, and Transfer Efficiency Scores are averaged across all Coats.  The Mil Build Score is based on how close the total mil build is to the Project’s total mil build target and may be different from the average average across all Coats. 

Users use Camera Mode to evaluate the part, tap the Back button to return to the Live Scene,  tap Restart Project to reset the Part and Scores (the equivalent of pressing Back and then Remove All), tap the Save Report button to save the Student Report to USB, or tap the Proceed button to open the Home page (in Free Paint, Free Blast, or Free Coat Mode) or the Courses and Lessons page.